I made and embedded this window so I could prove that the house walls are made of dirt. Nothing but the finest dirt.
Saturday, March 7, 2026

Thursday, August 21, 2025
Vaguely complete
This was a project that involved all my skills and trades. Many moving parts because the plaster walls were crumbling and the furred wall was in the way and the load bearing wall had to be propped up and a beam had to be made and then stabilized and the concrete floor had to be repaired. It was also an inferno here and working with fresh plaster made the room a sweltering sauna of old technology. But it's basically complete. The wall is gone and I added curtains and now the air conditioning works for my new bedroom and the plaster wall is completely repaired although not perfectly flat or flush with the old plaster but it at least is not allowing the adobe brick to deteriorate into the room. There is no point in adding drywall so I painted the old framework and hid the new electrical behind some trim boards. As if the biggest problem with this house is going to be exposed romex.
There was another project involving the pressure release valve on the water heater that led nowhere so I had to drill a hole in the wall and then plumb a drain for the valve and also the newly installed drain pan.
 In general I started with too much lime plaster and it had to be too thick and then if just fell apart. This involved a huge amount of mixing lime and sand and water with a drill that then burned up due to using an extension cord that was 16 gauge. But not before I mixed my last batch of plaster.
| ||

 |
| The final beam in place. I would not linger under it for hours and hours but it's basically safe. |
Saturday, July 5, 2025
Walls crumbling down
The plan is to add a framed window into the wall so the adobe will be on display forever.
I was shoveling the decayed plaster into a bucket and carrying it through the rain to a pile of debris ready to go to the dump.

Monday, June 30, 2025
Back in DIY Mode
Endless work that is rewarding but the casual guest would not even notice I've done anything. The drywall had to come off so I could repair the old plaster with Lime Plaster. And the AC condenser pan decided to crack and leak so that involved gluing the cracks while I hunt for a replacement pan. The wall needed a ton of lime plaster.
 |
| cracked condensate pan |
 |
| all the bottom 30 inches of this house have plaster that has turned back into dirt |
 |
| This takes a huge effort of mixing lime and sand and water and hurling it against the dirt. |
 |
| This wall has to be rearranged so I can benefit from the air conditioner in this area and also so I can fit a queen sized bed. the wall's only purpose is keeping the roof from caving in but I have plans to replace the framework with a big beam. |
 |
| the arthritic fingers on Oggy's hands have almost reached their limit which is why there is no time to delay to get this work done. He will soon be too handicapped to do it. |
Monday, June 5, 2023
Sewage Line
An epic, historic event took place this past April when I replaced the old Orangeburg sewer pipe that served this house. The project itself was a 2 week binge of digging and purchasing, but that was merely the sweat work. What preceded the labor was a period of 4 months in which I immersed myself in plumbing codes in order to pass the plumbing contractor test. I'm not even a fan of plumbing but I could not convince the city to permit me to do the work myself since the work was entirely on the public right of way. As a homeowner I am allowed to dig into the plumbing as long as it's on my property, but once it involves the sewer line to the main city sewer in the middle of a paved street, then I need a right of way permit and that can only be issued to a licensed plumbing contractor. A general contractor would not even be allowed to do that work. It must be a specialized trade CR-37 commercial and residential plumber with a bond. And the only way to get that license is to pass the state plumbing test And purchase a surety bond and complete the licensing application with fees and background checks etc. But I was left with that option OR pay a local plumber despite being totally unimpressed with the discussions I had with them...and unimpressed with their attitude and their workmanship as well as having zero confidence in their ability to ever complete the job at any price. Basically, I had local plumbers who were not worth $100 giving me a quote for $13,000...with no guarantee the project would ever be complete and definitely not to my standards. So, I'd be paying $13,000 to argue with an incompetent plumber who has a license and then do most of the work myself since they would never agree to go the extra mile. That made no sense. But the prospect of passing the plumbing test and then buying a surety bond and applying for the license and then manually digging a 140 foot trench didn't appeal to me either. What to do??
 |
| The Author pictured in march 2020 fixing the non-existent sewer line from his house to the sewer main. |
Saturday, December 10, 2022
Siding
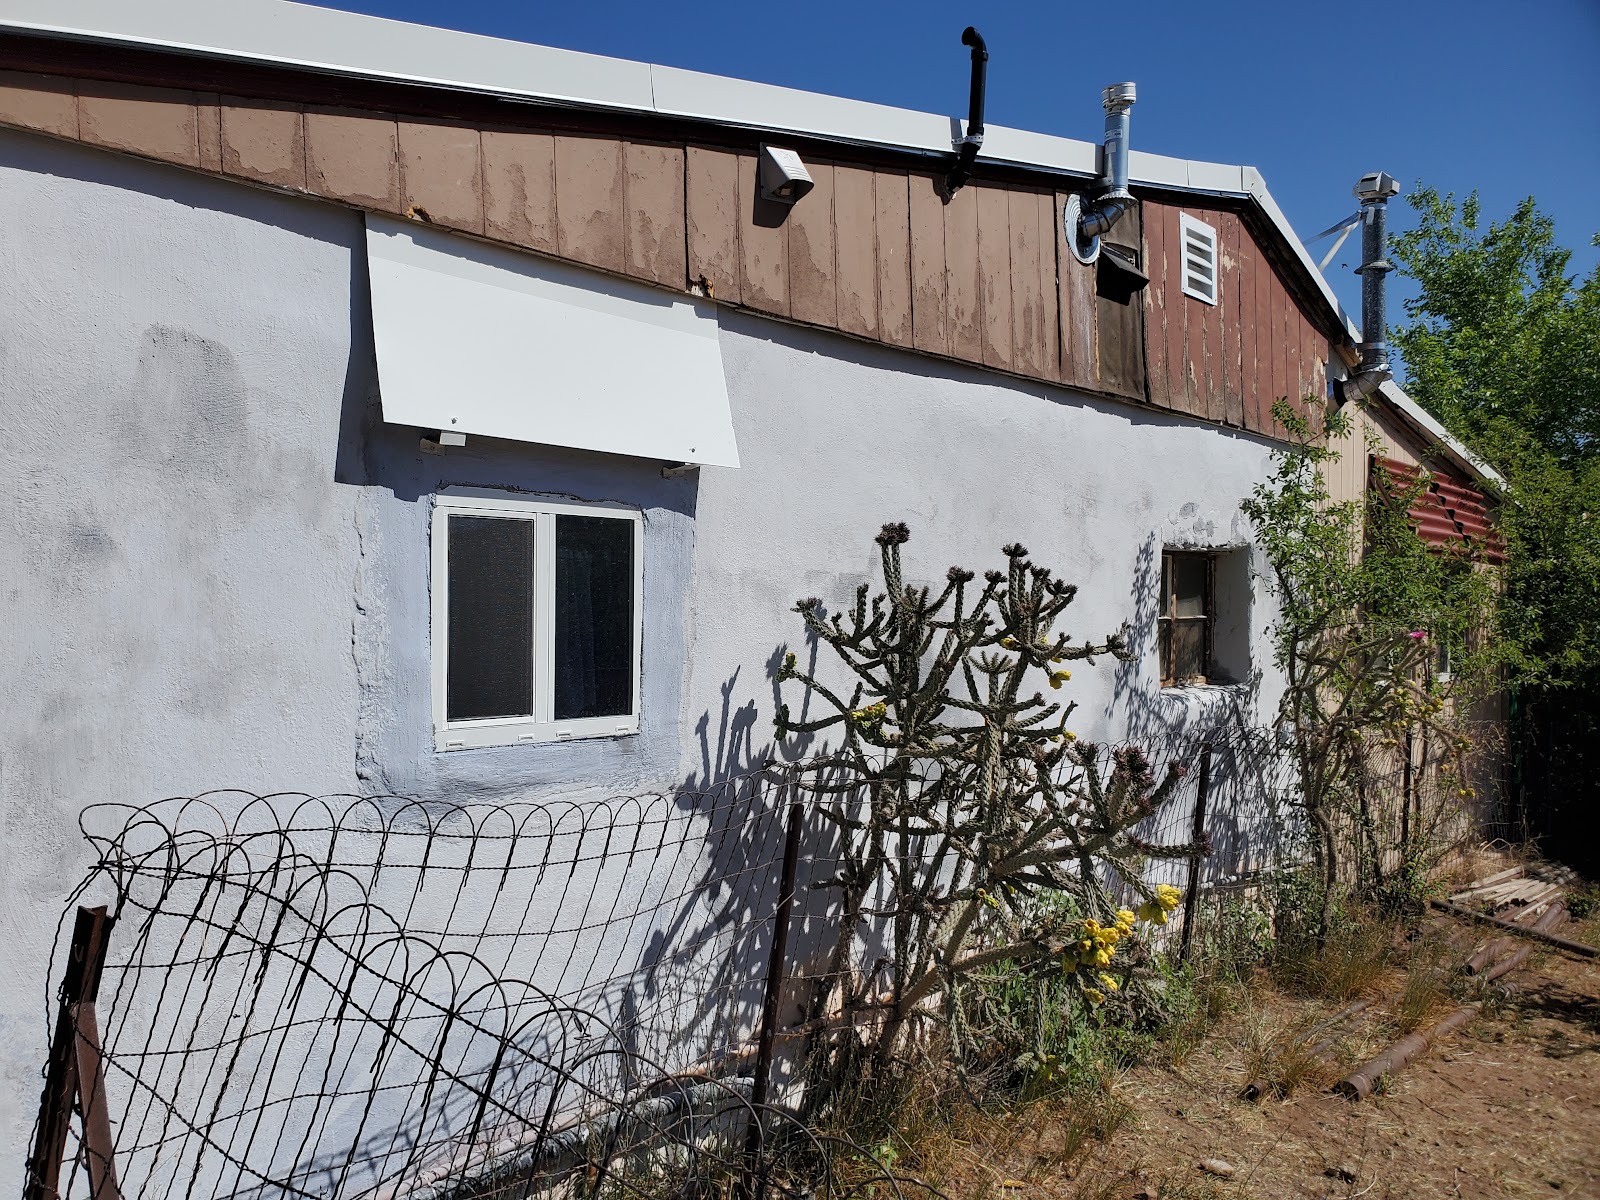
This was overdue. I bought basic brown and then managed to spill the entire gallon in the hardware store parking lot. So I scooped it up with cardboard. ponderous. Sometimes the first thing I do is some ugly mishap. I was extra careful to avoid adding more amputations or falling off the ladder. Really irks me to pour paint on asphalt right after I buy it.
 | ||
This is the original approach they took when they built the umbrella roof over the original roof. Board and Batten. Then they decided to just cover it with cardboard...which must've been a choice to save money on paint. Not sure.
|

Who doesn't love some metal band 15 feet from their bedroom giving me a soundtrack to work by?
Saturday, May 14, 2022
lime wash
So, I would recommend testing limewash on an area before going whole hog. I've had mixed results from applying a concrete bonding agent .to the paint and then applying the limewash. Sometimes it seems to bond well and other times it dries very quickly, does not bond and then flakes off in 24 hours. Actually, I would not recommend using limewash over paint at all. It's setting me up for a messy job of removing ALL the limewash with a pressure washer before I can apply real paint again. I like the IDEA of coloring a wall for $12 worth of limewash instead of $120 worth of paint, but the reality is this won't last as long as paint. Now, if you are applying limewash directly on brand new stucco or adobe then you will probably have better results. I applied some limewash on bare cinderblock and the stuff looks excellent 3 years later. But the exterior wall facing the wind and weather is different and it had old paint on it that is not a good surface for limewash so I scraped it and applied the bonding agent. I also used a mist sprayer as it was drying so that it did not dry too fast. That might have helped. I'm not sure. This is a learning experience and paint or colors are easy things to mess up and try again. There is not great disaster here. I am thinking a gold for the top wood, taking my color palate from the movie Encanto.
The plumbing is a different story, as I spent 6 months trying to get a plumber to give me an estimate for how much it will cost to replace my sewer line. Several came to look at it but they were not interested in giving me an estimate and I'm certainly not going to twist anyone's arm into taking $10k from me. IF they don't want the job then I don't really want them so I will broaden my search into surrounding areas. I even considered getting a plumber's license myself but the performance bond is like $4200 which I lose for 2 years. It insures me for about $750k worth of damage. And if the whole job costs $5k to finish then I will spend $10k either way and it makes me nervous to dive into the asphalt with no idea what to expect there.
So, I'm looking for some work again and will revisit the plumbing project in the Winter of 2023.
 |
| I pulled many cactus thorns from my hand. |
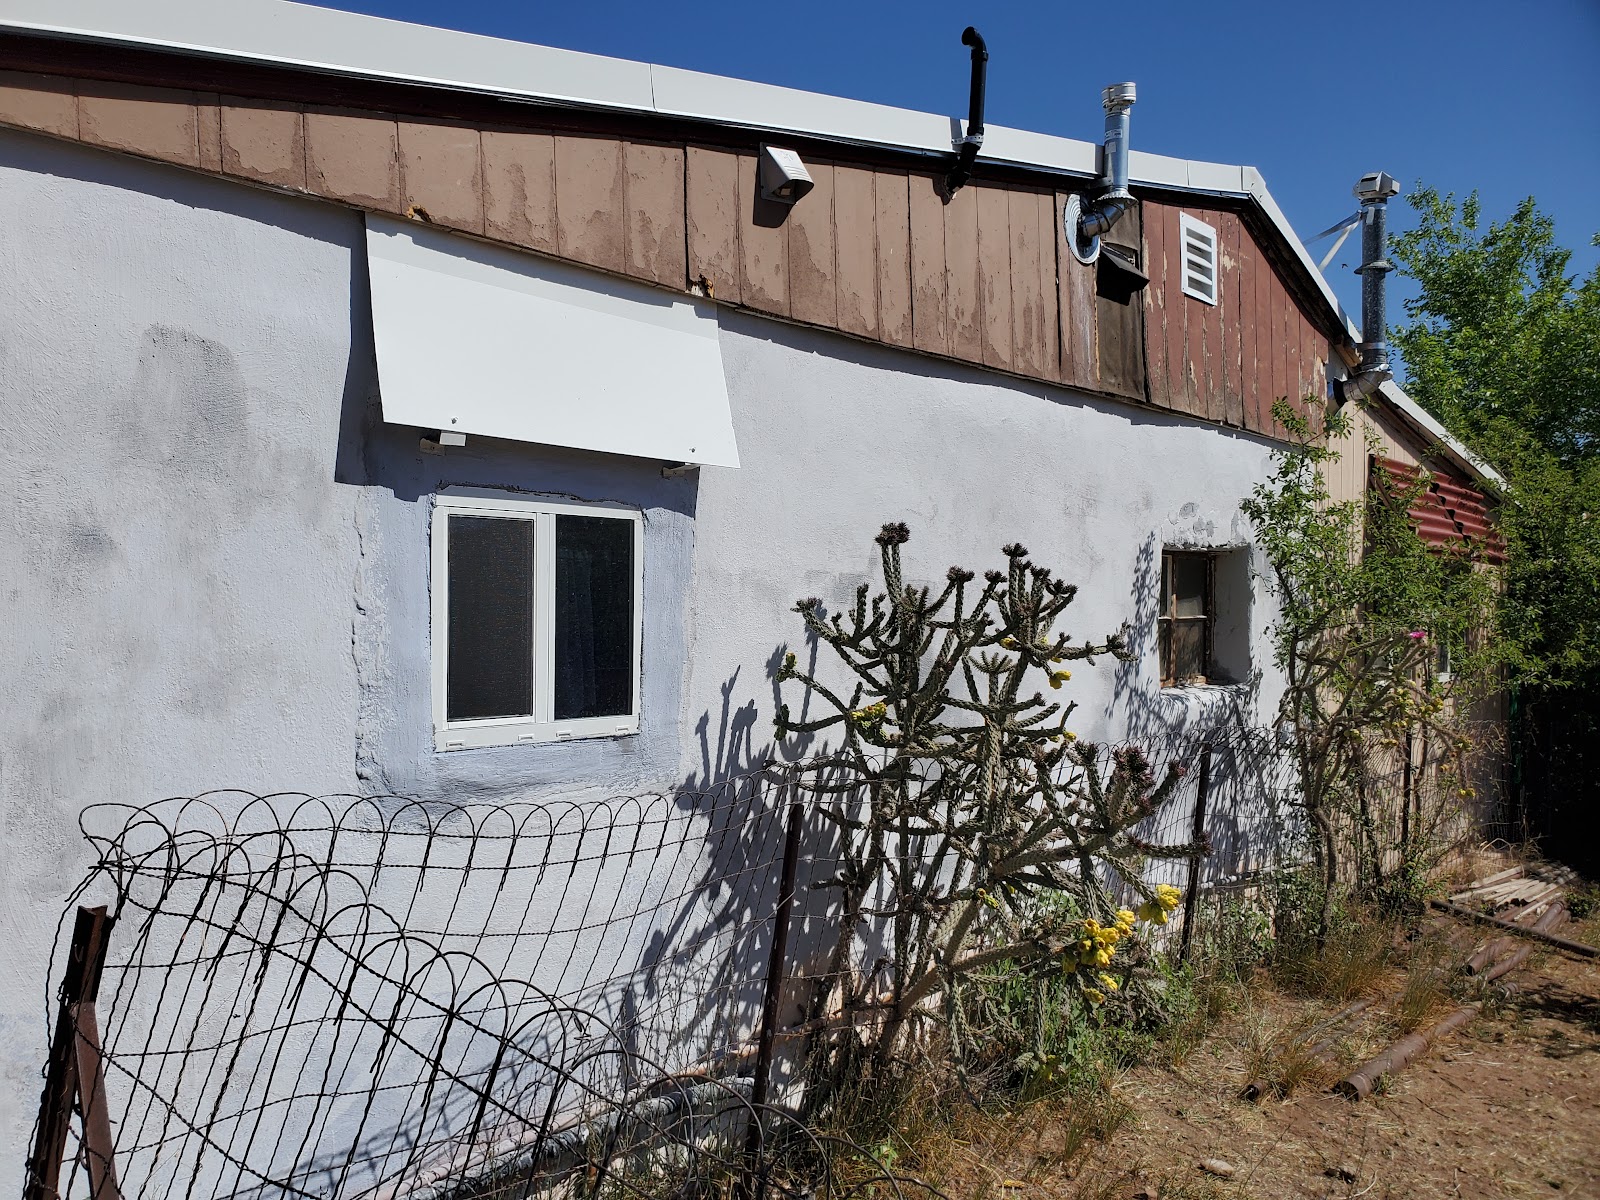 |
| That awning looks a bit out of place, but it does the job. |
 |
| Maybe Gold as a tribute to the Conquistadores. |
Tuesday, January 25, 2022
Motorcycle Repair
 |
| Motorcycle Tire signage soon to be flower planters |
 |
| This is more than a Honda Rebel deserves, but I bought the parts so they might as well be on the bike New front brake pads, new rear brake shoes, new tires, new front tube, new fork seals. I will say that working at midnight with some disco music on my garage radio, drinking coffee, wrenching, drilling, all on my own bike on my own property...was bliss. A dream come true after 40 years of doing this kind of work in a library parking lot or illegally in a tow yard or on the side of the street with rain pouring in the window and Nicaraguan military police shouting orders. |
 |
| Speaking of fork seals...this is the bolt that someone put locktite on and thus stripped out when I tried to extract it. I managed to fight with it and basically destroy it in the process, but it is a basic socket cap bolt. 8mm 1.25 pitch. 27mm long, but 25 mm also worked for $2. The Part # 90116-383-721 is unnecessary to buy. Just go to the specialty bolt section at Ace or home depot and get a 8mm, 1.25 pitch in the 25 mm length. put some loctite on it and use it. |
 |
| Really sucked getting the rear axle on. The smaller wheel spacer goes on the left side INSIDE the hub...the bigger spacer is on the right side, which is the side the axle is inserted into first. Then use a rubber mallet to push it through the wheel spacer...then through the wheel hub, out the other side through the smaller spacer and then through the swing arm. It took about 20 tries... |
 |
| What a total pain it was to break the bead on the rear tire. I had to use a pry bar. Fortunately, the inner tube meant I did not have to battle with the bead when I put the new tire on. |
One More Window
This latest window was not quite as terrible as the previous one because there is not a wire fence 6 inches from the wall that forced me to squeeze between the two and puncture my gallbladder with cactus thorns. This one merely required that I decide how deep I wanted to dig before rebuilding. Needless to say I wanted to dig superficially because the deeper I dig, the more damage I do. This window frame had elements that looked 90 years old and were definitely worn out, but in this climate I estimate they would last another 90 years. So, that puts it out of Oggy's lifetime. Someone put some work into building this raised stucco bump out so the trim boards are not proud of the wall. That was at least a good enough job for me, so I painted the old wood and put it back where I found it. Yes, a little rain would drift into the trim area but I can't say I'm concerned. The shudders are staying where they are and should deflect some rain. The rest will find a way down and over the wall. It's not a big deal. The important thing is the dust and rain will not penetrate the window.
 |
| This isn't even the worst this window has looked. When I bought the house a rock had been thrown through the window during a rain storm so water poured inside...and the window was broken and boarded up. I tried to fix the window but of course the hardware guy measured the window too small so the pane of glass didn't fit and I needed to use tape to hold it in. 3 years later I finally replaced the whole aluminum frame and single pane glass. |
 |
| Not a trainwreck, so I left it as I found it. |
 |
| These Vinyl windows had nail fins that were way too big. I always have trouble with the 3 different dimensions....nail fin, window frame...window opening. And getting them to match. This required I cut off the side nailing fins, and then screw THROUGH the inside of the frame of the window. Since the fin was gone. And I also had to drill into the stucco and use concrete screws in multiple places. |
 |
| A little paint and some new lime wash makes it look ok. |
Wednesday, January 12, 2022
Gym
This is my approach to a shade structure for my outdoor gym. We don't get a ton of rain, maybe 8 inches a year, but the sun will destroy anything other than steel in about 1 season so I needed shade and maybe some protection from mosquitoes...and a little privacy. The answer was a shed kit with these plastic connectors for 2"x2" lumber. I'm not in love with the small dimensions of the lumber and the connectors were mostly OK but the bottom of the truss doesn't do much. It's just a tiny bit of stability.
I hunted hard for a cheap approach but $1000 in materials is about the minimum this project can be done. That includes the 120 pavers, the pressure treated bottom frame...all the lumber...the metal roof and the shade cloth.
Pavers...$120
Metal roof ...$200
plastic connector kit...$200
Lumber....$300
Shade Cloth...$100
There is an argument that spending $1000 to protect $600 in gym equipment makes no sense but I must stress how hard it is to find this equipment as far out in the desert as I am. It'll cost another $100 to get electricity to it so I can ditch the extension cord.

Window to the World
This train wreck of a window was nagging me. I was almost certain the wall would collapse if I took anything apart because there is nothing supporting the window void except the window...which is an aluminum frame. But something had to be done so I tore into it.

Wednesday, November 17, 2021
Tuesday, March 23, 2021
Crazed Pandemic Projects
This really is a ponderous time. I gotta say I'm kind of glad I'm not living in my van right now. I'm sure I would've moved to Mexico or Guatemala again because these are trying times here in America. But then I would've missed out on the insane amount of unemployment welfare that the future gave to me to finish these house projects. So, I guess I did the right thing buying this house when I did. Imagine that: Oggy did the right thing for once. Maybe domesticity isn't so bad.
Thursday, January 7, 2021
Ceiling Tiles
Tin ceiling tiles are not as easy as as nailing them up. The ceiling has to have a substrate of wood to hold the nails. And the ceiling joists have to be strong enough to hold that up. Then the edges have to parallel. Then the edges have to overlap in a direction that looks good. Then the lamps have to line up and the electrical has to be finished. Etc. etc.
The cost is about $7 each tile. But the shipping is $300. So the tiles might only cost $350 but the whole cost is closer to $800. I thought long and hard about going this route and decided it was now or never. So I bought them and installed them with a 5/8'' brad nail gun. The edges look rough. The edges aren't parallel. The metal got dented many times. The corners of the crown molding don't look good. It looks a little cheap even though it cost me $1000 and lots of time. I think a border of tongue and groove painted pine would've looked more classy. And the crown molding doesn't look very good and was impossible to finesse so it looked good.
 |
| if the ceiling looks slopped that's because it is sloped to accommodate more insulation. |
 |
| The unfinished look doesn't appeal to me. I will have to paint this. |
 |
| Newest decoration |
 |
| Tin Ceiling in kitchen looks good. |
So, that's the last project for a while. I'm broke. unemployed, the country is besieged by zealots, my knees are surely arthritic, my hemorrhoid's have returned with a vengeance, and interior decoration doesn't really appeal to me right now. I only wanted to finish the ceiling because the insulation dust was pouring down through the cracks in the foam board.
Sunday, December 20, 2020
Wall Furnace
 |
| I had to splice the yellow Power Pile wire with 12 gauge wire because the correct crimp fitting had been changed for some reason to a male fitting when it actually GOES to a male fitting. So, that didn't work and it was too short to snip and put a new terminal on that wire, so I spliced two Female terminals on there. |
This mess is the wiring for the cozy wall furnace valve. This is older so it is basic. I'm not saying how I wired it is right, but it works. I had some trouble because I removed the critical overheat wire from the TH-PP terminal and misjudged where I got it from so I put it back in the TH terminal with the thermostat wire. My older notes did suggest this is how it was wired but it didn't work. This led to the pilot light working but the thermostat would not engage the burner. I battled it and you can see that the diagram in the manual sort of blurs where the hell the connections are for the power pile is. In fact, you can't even see where the power pile is in the diagram but it's in the lower left corner...it has a yellow wire coming from the center of a threaded unit in one photo where I had to identify what it is. That wire doesn't wander off to the left. No, it is terminated like in the unit on the right with the red wire that goes to the TH-PP terminal. That's the Power Pile.
So, the TH-PP terminal gets a wire from the Power Pile, AND a wire from the Pilot Generator, which is sometimes called a thermocouple which actually generates 500 millivolts from the heat of the pilot light. Pretty clever! And that terminal gets an overheat/blocked flue wire too. Now, if they called that terminal the TH-PP-OH (for OverHeat) then I wouldn't have been confused. But they didn't and I messed up when I put it all back together.
The TH terminal gets exactly one THermostat wire. This makes sense but also makes me wonder what the TH stands for in the TH-PP terminal that does NOT get a thermostat wire. I guess that TH means THermocouple, but am I the only one who thinks two different TH terminals that mean two different words is a mistake? Thermostat and Thermocouple...how am I supposed to know the top TH means Thermocouple? Especially when their own diagram calls it a Pilot Generator. Call it PG-PP. Right? Pilot Generator + Power Pile. Does that make too much sense? And the manual itself is not clear either. So, the terminal ID and the diagram are both crap. They figure only an experienced HVAC tech would wire this, but then they provide horrible diagrams? why bother? To tempt me into thinking I can do this myself. Like crimping lugs on wires is so hard?
The PP terminal gets exactly one pilot generator wire. Maybe the PP means Pilot Power? Maybe Pile Power.
That will still leave you with one Overheat/Blocked Flue wire and also one wire from the Thermostat. These two wires are connected with either a male/female crimp fitting, or just a wire nut.
As near as I can tell the overheat sensor is a normally closed circuit that will OPEN when it gets too hot. The Thermostat is a normally Open circuit that closes when the mercury blob (in my case) completes the circuit between the two wires.


The mini-split heater does generate heat and it keeps the room around 70 degrees, but I'm sitting here with blankets because a super dry 20% humidity and 70 degrees is not super comfortable. I'd prefer more like 75 and I'm not sure the split unit can get to 75 degrees. And even if it does, it will use electricity and wear down the unit, which is best saved for cooling in the summer. See? I had to decide if the wall furnace was going or staying and I decided it would stay. The minisplit also blows warm air out that kind of creates a draft I don't like. The furnace simply produces hot hot air that drifts through the room. It's superior heat.
So I sawed through the wall, connected new B style gas vent and then put the wall furnace back together since a wall exhaust exit with B vent is not so easy unless you cut a huge hole ,which I did not. I cut the minimal hole and there was no way to get the adjustable elbows through it and then back down onto the heat diverter where the gases exhaust from the furnace. So, I had to take the combustion chamber out with the heat diverter and then get the vent all situated and then put the combustion chamber and heat diverter UP INTO the stationary duct. It was a pain.
But it's all for the purpose of optimal heat in the house, using what I have, gas is cheap and the furnace worked all winter last year and I expect it to last this winter too. I could replace the valve but I treat the furnace like a temporary unit that I shut on and off each time I use it. I even turn the gas valve off, which I don't have to do since the valve on the furnace works, but the automatic shut off stopped working so I don't fully trust it. This means the pilot light comes on without having to depress the knob. Gas immediately goes to the pilot light when I turn the knob. I can tell no gas comes out when it's off, but is it such a big step to turn the hose valve off too? No, it's better to keep all the valves off, and when I want heat I turn both valves on, light the pilot light, turn the thermostat up, etc.
If this is confusing imagine how confused I was when I was looking at these wires.
Tuesday, December 8, 2020
Metal Roof
This metal roof project took only 6 days to install, but it took 12 months to finally get a company to cooperate and do business with me. Jeez!
I have some comments about the metal roof. The critical part is definitely the measurements of the panels themselves. On the alley slope I was 1/2'' off from totally perfect. The other side was actually perfect except for the width, which was not square and forced me to make a weird rip. It is a roof, but I didn't know to check the width in divisions of 16'' or I would've seen the last full panel was going to land in a spot that would make a terrible final ripped panel. I think the only way to start would be to rip the first panel or buy a 12'' panel to start with and make the last full panel end in a good spot.
But it's behind me. 6 days of work was agony on my old knees. The mind is willing but the body is wanting.
I will summarize this project at another time. If the measurements of the panels are right and even with a roof that is not square and has weird bulges and humps, it's still possible to push forward and get everything looking ok. A wise man said, "A roof is a rain deflection system." It's not waterproof. It deflects rain off the house. Something to ponder.

Saturday, October 17, 2020
quirks
what a battle trying to figure out what size furnace duct I have. turns out I have a 4'' exhaust that measures 5'' x 1''. That fits into a rectangular duct that is 5'' long but is called a 4'' duct since it has the same circumference as a 4'' round...then an adapter to accommodate a round vent pipe...which I plan to send through the wall.

the other important project was trying to stabilize the plaster. I go back and forth thinking the original plaster was flawed or got damaged but lately I think it's simply 90 year old plaster that no one ever tried to maintain or repair or clean or anything. Of course it crumbled. My plan is to stabilize it and finish it and let nature take its course. I'm not covering it with drywall ever. And I embedded rocks in it because that's what made sense.


Monday, October 12, 2020
Electrical goofs
Just when I think I have a grip on how to wire residential outlets and lights I do something that makes me think again.
I think of electrical as a big loop. There is Hot...which is always hot because it's coming from the panel and is searching for a path to ground...which is supplied by an appliance or lightbulb that completes the circuit. I think of Neutral as only carrying current when the circuit is completed by an appliance. If a light is off or an appliance is not plugged in then I tend to think of the Neutral wire as carrying no potential current. This is contradicted by the nature of alternating current as a back-and-forth loop, but I ignore that to make the physical installation easier to visualize. The loop begins at the hot leg of the circuit panel where the breaker is. The neutral bar also leads back to the transmission wires so it's also a source of current, but I like to think of the hot wire as the 'start' of the power.

Saturday, October 10, 2020
Plaster Wall
My goal was to expose the electrical wires so I could replace them and it ended up as a project to rebuild a lime plaster wall. what a drag.
I'm juggling a few projects right now but I have to focus on the electrical wires. The walls are cosmetic at this point. The ungrounded aluminum wires are more important. Then the metal roof will arrive and I will get into that. But for the next week I have a chance to completely replace the old knob and tube wires with modern grounded Romex. It involved cutting several holes in the ceiling drywall but there isn't an easier solution. It's only a problem because I'm living in the house and cutting holes in the ceiling creates awful drywall dust and also lets the dust of 100 years into the room.
I think this house is closer to something I would call "Cob" and not true adobe brick. It's more like a dirt layer and then covered with lime mortar on the inside and stucco on the outside. I don't see adobe shaped bricks. This is amusing because I went to a village of cob houses and thought they were quite earthy. But the shape of this house is like an adobe house, but it's closer to cob or rammed earth or mud.
This is all relevant because with an earth house the walls need to be able to dry out as fast as the earth so cement interior walls would cause problems by trapping moisture. My goal is to repair the wall surface with something similar to the original so it will not only keep the dirt from falling out but will breathe.


Sunday, October 4, 2020
Lime Plaster
There's definitely an argument for leaving everything alone, like this wall that I know is drywall framed over a plaster wall because someone decided to hide problems rather than deal with them.
But the electrical wires are back there, and the drywall had been wet once before, and it's easy to replace but the drywall is currently in the way of my project, so I had to get rid of it.
 |
| Time to tear down this drywall |
 |
| what a mess. 40 years of neglect just falls from the wall. If I wasn't careful I would've dug a hole right onto the alley. |
 |
| Although that looks like modern Romex wire, it's actually 12/2 WITH NO GROUND WIRE. I don't know why they manufactured residential Romex without a ground, but I guess they wanted to make sure it was useless to me. |
 |
| The big question is what is this made of? I determined the wall is |
 |
| Do, I buy Type S Lime and some sand... |
 |
| Mix up a paste of lime...then add sand until I get something like plaster consistency. |
 |
| This is not easy to do neatly, and I'm not very neat when it comes to plaster in the first place. I'm dealing with a dirt house on an alley and as long as the mortar stays in place and dries up and keeps the dirt inside the wall, I really don't care if there are variations in the surface. So far, it's working. The lime/sand mortar hardens and adheres. I plan to tint some limewash to paint the surface and let net nature take its course. |
 |
| The main priority is replacing the wiring with modern Romex. I was recently able to replace all the exterior wiring to the first outlet or junction box inside the house...so all the circuits are independent for the first time in a year. Previously, someone ran 3 white wires from the panel for the hot wires, and a single white wire for the neutral wire. And then at the last junction box before a split of the three circuits they simply spliced into the single neutral with 3 wires to create the neutral path from the circuits. This means that when I shut off one circuit breaker I still have an active neutral from each of the other two circuits that is connected to the circuit that I shut off. Perfect! I did test the circuit and found no current but I didn't totally trust that a spliced neutral would not accidentally choose my fingers as the shortest path to ground rather than go back to the breaker box. So, now I have modern wires from the breaker, in conduit, the correct color and independent for each circuit, AND there are no frivolous splices in junction boxes where I know I will never need a splice again. Previously, I had a splice in 3 different junction boxes for no reason. It was just splicing two short sections of wire, which is something I can't live with. And it was stranded 12 gauge wire, which I'm not sure is even correct for interior residential. In the rafters is Classic knob and tube 10 gauge aluminum wire from the 40s or 50s. And I'm in a town with the biggest copper mine in America, and they used Aluminum wire. Some bitter irony right there but I think it was WWII that caused a shortage of copper wire so they used Aluminum before they realized this mismatch of aluminum and copper was a bad idea. I have to cut a hole next to each light and then pray I can fish or pull new wire from each switch leg back to a new junction box and then to the light. I think the worst that needs to happen is I cut into the ceiling drywall to facilitate pulling the wire. I'm not a fan of destroying drywall while I'm living in a house. I don't believe in sanding drywall mud when I repair it due to the dust it creates, so the best thing is to avoid using drywall mud by avoiding cutting any drywall. Irregular surfaces on obvious drywall joints is not a detail I care about now or ever. The trick is to make the joints so obvious it looks like it was on purpose. Or just cover them with some trim so it looks fancy. |
Subscribe to:
Posts (Atom)